Start up guide
How to start
To get the best use out of your system, we suggest the following.
1.
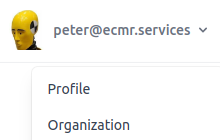
Login from the menu, top-right.
 Choose Profile and update your settings and details, especially your name and email address.
2.
Choose Organization from the menu and update your organization details.
Especially your address.
If available, add a logo of your company.
If available, add a logo of your company.
3.
You can also start adding some of your most used addresses.
Go to the menu Addresses on top of your screen.
Click button and fill the address form with relevant details.
For existing addresses, you can add logo's as well.
Click button and fill the address form with relevant details.
For existing addresses, you can add logo's as well.
How to create a CMR
1.
Choose from top menu: New CMR.
 Create a new CMR by filling in your relevant details in the CMR form.
2.
Find addresses you've added to your system before by clicking button 'Search address'.
 If a selected address contains a logo, this will be filled in box 22, 23 or 24.
3.
After saving your form, you have some options:
3.1.
When clicking button:
For every CMR the administrator is able to add signatures in boxes 22, 23 and 24.


3.2.
When clicking button:
You can modify all fields in your CMR with relevant details, but you can also add numerous documents to your CMR from box 5:


If you click on the plus sign, the name of the added documents will be placed in box 5.
The actual attached documents are added to your eCMR, therefore go to your exported CMR and click at the bottom of the page
3.3.
You can add photo's with your web browser and mobile phone.
This is only possible with a CMR that has already been created. To do this, click on the photo icon in the CMR form.

After a photo is added you can see it in your CMR-form. By clicking the green icon the photo is displayed.

Note: when trying to make pictures with your mobile phone, the functionality could be blocked depending on your settings in your mobile phone. Therefor check that the permissions in your browser AND your camera allows you to make photo's.
3.4.
Share your CMR with relevant parties: sender, receiver and/or carrier.
This is only possible with a CMR that has already been created. To do this, click on the share icon in the CMR form behind the email address.

A new window will open where you can send a message to a specified email address. The recipient of this email can then add a signature or photo to this CMR.
This can be useful, for example, when a discussion arises about the condition of a shipment. Each party can add photos of the shipment the moment it was send, transported or received.
This functionality also gives you the option to record responsibility once a signature has been made.
3.5.
When clicking button:
Your CMR will be locked and can't be edited anymore (except by the administrator).
Every exported CMR can be print as hard copy by using button
Every exported CMR can be print as hard copy by using button
3.6.
The eCMR is displayed and/or printed in the language that is set by the user.
The English language is shown as the second language by default. Unless the user has set English as the user language, then the second language is French.
If you want the eCMR to be displayed or printed in another language, adjust the user's language setting. Go to the menu (top right) and choose: Profile.
How drivers can collect signatures on an eCMR
1.
Invite drivers in your organisation.
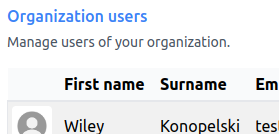
Go to page Organization (menu: top right) and use the following button at the bottom of the page:
Users can have different roles with different tasks. You can invite as much co-workers if you like.
When your invitation is excepted, the driver will be displayed in your list of organization users.


2.
To assign a job to a driver, go to menu Shipments (at the top of your page).
 In menu Shipments all CMRs/shipments of your organization are displayed.
Select the shipment you want to assign and click button:
 .
.
In the following screen you can assign the shipment to the driver of your choice.


3.
The assigned driver has his own environment from where he can collect signatures for the eCMR.
After the collection of the signatures the status of your shipment is changed in something like: 'CMR signed'
At the same moment the collected signature will be visible on your eCMR.
At the same moment the collected signature will be visible on your eCMR.
Extra functionality in your system
1.
In 'Show Shipment' every detail of every shipment can be viewed.
Go to your Shipments (top menu), select a shipment and click
 .
.
1.1.
On the bottom-left you'll find a Google map with the pickup-point (P) and the delivery point (D) of your shipment.
1.2.
In box 'Annexed documents' you'll find the attached documents of this specific shipment.
1.3.
At the bottom of the page you'll find button
From here you can download documents and photo's.
1.4.
In box 'Shipment history' you can follow the flow of your shipment, what happened at which moment.
You can check who was responsible for any given' change of your shipment. Therefor click button
, at the bottom of the page.
2.
In 'Shipment history' click the small arrows to see information and changes of the selected shipment.
The eCMR procedure
1.
The user who creates the CMR is the owner of the eCMR.
2.
The owner can share the eCMR with the sender, the recipient and the carrier of the cargo to which the eCMR relates.
3.
The integrity of the eCMR and the data contained therein are guaranteed if the owner does not modify the eCMR data after the eCMR has been shared. Sharing an eCMR can only happen if the eCMR is exported by clicking button
.
This will lock the eCMR.
4.
The progress of the eCMR (and shipment) can be made transparent to the user through successive statuses. All actions on an eCMR are logged. Check button:
This button makes it possible to trace which user performed which action at which time from which device.
5.
The parts of the eCMR that can be shared (with the sender, the recipient and the carrier) only concern the options: adding signatures, adding photos and adding possible comments when picking up or delivering the cargo.
6.
Substantive adjustments to the eCMR can only be made if the owner unlocks the eCMR, makes adjustments, and, if desired, locks it again and shares it again.
7.
A user's electronic signature is made reliable if it is inextricably linked to the eCMR. Sharing an eCMR can be done, among other things, using a secure link, so that it can be guaranteed that a signature of a shared eCMR can be placed from a user's own device.
8.
The eCMR can be archived for as long as the owner of the eCMR wishes. Users can always choose to download the CMR and print it as a hard copy and archive it themselves.
